The Online Designer, or ODEC, has its own set of terminology. Everything that can be edited independently from something else, from pictures to text boxes, are referred to as Elements. The property Editor Panel Shows up on the far right. You can edit Elements there. Use the top bar to add new elements.
=New Elements=
The Line, Rectangle and Circle buttons all allow you to add their respective shapes. Stock Images allows you to pull from a selection of stock Clip Art. Text boxes allow you to insert text. Most elements are either completely locked down or completely able to be edited. Text boxes are slightly different though. You can lock down the size and position of the text box, and still allow users to edit the text during the ordering process. Upload allows you to upload your own images. For supported file types, check Supported File Types. Proof lets you view the high resolution printable file. This button can be disabled for customers.

=Property Editor Panel=
In the Editor Panel, every element you select has a few similar options; common, colors, and dimensions
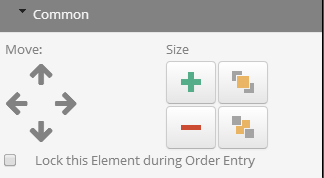
The Common tab is used for simple location and size changes. This is also where you lock down elements so they can't be changed during the ordering process.
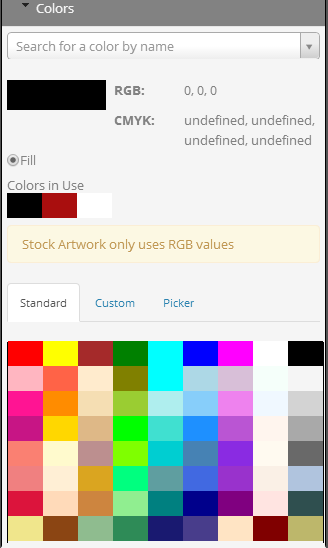
This tab is where you choose what color you want your elements to be. For more information on working with colors, see the Working with Colors
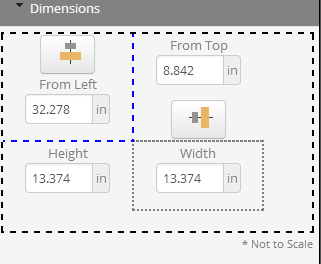
The Dimensions tab is the more detailed way to set the location of your objects. You can give exact values for position in space, and their height and width.